Bacon-Bourbon Jam

I managed to survive preparing another Easter dinner for my extended family of 25 guests. Thanks to some clever planning by my mother and me, my Sunday afternoon in the kitchen was a relaxed affair consisting mostly of shuffling pans into and out of  the one oven (with no warming drawer) in my sister’s kitchen. The stars had properly aligned, resulting in Mom serving her homemade lasagna (my gold standard for that dish), while I took care of the ham and side dishes.

As a reward for my work I took home the unsliced ham ends and all of the ham bones, as well as an “extra” pan of the lasagna. It’s good to be the sous chef.

Unfortunately, I lost an entire weekend of cooking at home, which is when I undertake most of the projects I write about here. Inspiration struck as I prepared breakfast and realized that I had not yet reported on the wonderful stuff I was spreading on my muffin: bacon-bourbon jam. I discovered the recipe at Serious Eats and, once aware of its existence, knew the Belm Utility Research Kitchen would be incomplete without it.

As explained in the recipe, most of the ingredients are things you’d normally have in the kitchen, and the use of supermarket bacon instead of fancier or homemade stuff is recommended. I assembled a pound and a half of bacon cut into one-inch pieces and divided into two portions, two diced medium onions, three cloves of chopped garlic, a half cup of dark brown sugar, a half cup of cider vinegar, a quarter cup of maple syrup, and six tablespoons each of brewed coffee and bourbon (Maker’s Mark).

I cooked the bacon in two skillets until it was crispy and the fat had rendered.

I poured off (and saved) all but a tablespoon of the fat, then cooked the onions and garlic for five minutes before adding the sugar, syrup, vinegar, coffee, and bourbon. After simmering for two minutes, I added the bacon and stirred to combine.

I transferred the mixture to a slow cooker set to high, and let it reduce for four hours.

I pulsed the bacon sludge in a food processer until it had a coarse texture, then transferred it to a few storage jars.

This jam is worth eating straight out of the jar, but I’ve been spreading it on toast and muffins, in particular the muffins I had left over from the eggs Benedict from scratch breakfast.

The jam is sweet, smoky, and meaty, with a slight bitter undertone from the coffee. I’m thinking it would be a welcome addition to grilled flatbread with goat cheese and arugula, or it could be used in the place of a more traditional fruit accompaniment to an aged Stilton. I’ll try those experiments soon, but in the meantime I have jam tomorrow and jam yesterday, as well as jam today.

Posted in food & cooking | Tagged , , | Comments Off on Bacon-Bourbon Jam

Grilled Jerusalem Artichoke, Red Onion, and Olives

Carl Jung and Sting to the contrary, I don’t believe in synchronicity, but find the term a useful description of the series of happy accidents I occasionally experience. The sequence of events that led me to this recipe is just such an example: a few days after eating the potage of Jerusalem artichoke with olive oil and chives, I found Jerusalem artichokes at my farmer’s market. I wasn’t sure what  I’d do with them, but I couldn’t pass them up.

While consulting The Whole Beast for the pheasant and pig’s trotter pie recipe, I noticed this salad. It looked simple and well-suited as an accompaniment, but I didn’t have all of the ingredients at hand when I first baked the pie. I pulled everything together a few days later: six large Jerusalem artichokes, three peeled and quartered red onions, two bunches of watercress, curly parsley, and Arbequina olives (which “give a gnya to the salad”).

I boiled the artichokes in salted water for about 20 minutes, until they were tender. (In addition to softening them before grilling the boiling also breaks down the gas-producing inulin and fructosans that make up 50% of the root, something I learned from Harold McGee’s The Curious Cook, which devotes an entire chapter to “Taking the Wind out of the Sunroot.”)

While the chokes cooked, I tossed the onions on olive oil and balsamic vinegar, wrapped them in foil, and roasted them in a 375°F oven until they were soft, about an hour.

I cut the chokes lengthwise into 3/8 inch slices, then seared them on a grill pan for about three minutes per side. I trimmed the watercress above the thick stems, chopped a handful of parsley, and made a simple lemon-garlic vinaigrette. I tossed everything together with a handful of the olives and dressed the salad lightly.

I served the salad with the leftover pheasant pie:

The acidity and slight bitter finish of the salad was the perfect balance to the richness of the pie. The choke slices were sweet with a bit of smokiness from the grill; I’d consider serving them that way without the accompanying greens.

When I looked at the collection of starting ingredients, I had a hard time imagining how they would taste together, but I should learn to trust Fergus Henderson, who has a knack for these sweet/bitter combinations. The parsley, in his words, “acts as a great marrier of disparate parts in a salad, the dating agency of the salad world.”

Posted in food & cooking | Tagged , | Comments Off on Grilled Jerusalem Artichoke, Red Onion, and Olives

Duck Variations: Confit

Charcuterie is an art that rewards patience. Brining, curing, smoking, pickling: all of these things take time, but the final results are unlike anything you can whip up in a few hours in the kitchen. Charcuterie also demands planning and consideration of ingredient seasonality. If you think far enough ahead about what and when you want to eat, you can create a rolling schedule of meals based on what comes out of the smoker, curing cabinet, fermenting crock, or refrigerator.

When I bought twenty pounds of duck legs in February, I had duck confit in mind. The preparation is simple, but the longer you wait to eat the final product, the better it tastes. Apart from the duck itself, the other key ingredient is rendered duck fat, and plenty of it. I ordered a seven-pound bucket of the stuff the same day I bought the legs:

I had eight legs ready, along with a half cup of kosher salt, two bay leaves, two tablespoons of chopped thyme, a quarter cup of parsley leaves, and a teaspoon of black peppercorns.

Following the techniques described in the Bouchon cookbook, I combined everything but the legs in a food processor, making “green salt.”

I rubbed the legs with the salt (about a tablespoon per leg), packed them into a baking dish, covered the dish with plastic wrap, and let it sit in the fridge for 24 hours. The next day the legs had darkened and firmed up a bit, leaving some liquid in the bottom of the dish.

I rinsed and dried the legs, packed them two layers deep into a medium pot, and covered them with melted duck fat. After ten hours in a 190°F oven, the legs were tender.

I let the legs and fat cool, then removed the legs to a new container while I strained the fat and let it settle.

See that pink layer below the fat? That’s the meat juices and rendered collagen, a culinary treasure. I poured clarified fat from the top layer into the container holding the legs, covering them by about a half inch.

I decanted the remaining fat and the confit jelly into separate containers.

Six Weeks Later:

I took the duck legs out of the fridge and let them come up to room temperature, which would let me remove the legs from the fat without tearing the meat.

While I waited, I made two other confits: onion and garlic, both from Bouchon recipes. The onion “confit” is actually an onion soubise, cooked low and slow with butter until the onions are soft but not browned.

The garlic is cooked in oil over low heat for about an hour, until the cloves have softened.

The recipe yields were more than I needed, so I stored the extra onions and garlic in the fridge. I bottled the excess garlic oil, which I will use for sautéing and vinaigrettes.

I reheated the duck legs, skin side down, over medium heat until the skin was browned.

I spooned some of the fat from the pan into a baking dish, added the legs skin side up, and put the dish in a 375°F oven for about eight minutes to heat through.

While the legs cooked, I made Lyonnaise potatoes: sliced fingerling potatoes cooked in duck fat with the onion confit.

Juggling a third pan, I made sautéed spinach with garlic confit, adding a dollop of the confit jelly as seasoning.

Timing being everything, all of the components were ready for the plate simultaneously:

For me this plate is comfort food at its best. It’s simple, balanced, and full of the things – duck, duck fat, garlic, salt – that make life worth living. It’s also easy to prepare once you get into the six weeks in advance grove. As Alton Brown is fond of saying: “Your patience will be rewarded.”

Duck Variations: Confit on Punk Domestics
Posted in food & cooking | Tagged , , | 3 Comments

Bonus Bits

The Jamaican work visa problem was resolved, which means Massachusetts farms will have workers for the spring and summer. The timing couldn’t have been better, as it’s lambing season at many of the farms, including Stillman’s, where I get my monthly meat fix. This weekend’s share was lamb-centric: lamb ribs, lamb stew meat, and lamb leg steak, along with ham steaks, pork cutlets, Italian sausage, and a whole chicken. Now that I know how easy it is to make my own, I’m not nearly as enthusiastic about getting sausage every month as I used to be.

Within an hour of putting away my share I received this message from Tamar, the bad-ass line cook I’ve mentioned before:

A farmer friend was raising pigs for me and the restaurant when she brain froze and forgot that taking the pigs to slaughter on a non-USDA inspection day would mean that we can’t use it. She sold the meat to others, but i have all the offal. Would you be interested in heart, liver, fatback, trotters, and kidneys from a very happy pastured pig?

You know what my answer was, so yesterday afternoon I drove out to Tamar’s place, bearing a gift of vegetable scraps for her chickens. She led me to her meat freezer, the contents of which bore a startling resemblance to the Belm Utility Research Kitchen Deep Storage Facility, and let me take home this pile of pig parts:

That’s six huge trotters, a chunk of leaf lard, two hearts, two kidneys, and a massive slab of fatback. Some of the trotters will become a new batch of trotter gear, the lard will get rendered, the fatback will be added to new sausages, and the hearts and kidneys are destined for the grill, probably accompanied by homemade bacon. All of these gifts from the magical animal cost me a mere dollar a pound. Time to get cookin’.

Posted in food & cooking, local | Tagged , , | Comments Off on Bonus Bits

Je Me Souviens de la Viande Fumée

We’re only five months into the year-long series of Charcutepalooza challenges, and I have already developed a history of cooking and writing about the subject of a challenge months before it is announced. Bacon? Duck prosciutto? Been there, done that, sometimes twice. It happened again today with the announcement of the May challenge - grind meat and make sausage – which, as luck would have it, I had already done.

But sometimes I get lucky. When I visited my butcher to buy brisket for the corned beef challenge, he hauled out an entire fifteen-pound primal. He told me the first cut (the thinner end) was the traditional cut for corned beef, and that the other half would be perfect for pastrami. I had him trim the fat and split the primal, leaving me with two six-pound slabs of beef for brining. I already knew that the thicker cut would become pastrami, because I still had fond memories of viande fumée – smoked meat.

I had guessed that the April challenge would involve hot smoking, so I brined both of my brisket cuts simultaneously, knowing that one would be spending time on my smoker. As St. Ruhlman explains in The Holy Book:

Pastrami differs from corned beef in two main ways: it’s smoked and it’s coated with a combination of coriander seeds and black peppercorns. Other than that, it’s corned beef under a smoky crust.

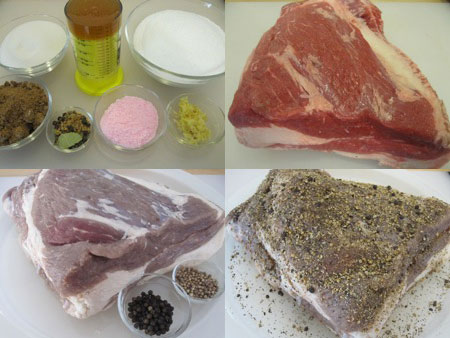
I followed the recipe, converting a magnificent slab of beef into a brined and crusted proto-pastrami awaiting its date with smoke.

Ruhlman explains that traditional pastrami is first cold-smoked, then hot smoked. I emailed him to ask how much cold smoking was required, the answer came from Brian Polcyn: “Two hours cold smoke then hot until proper internal temp is met.” I had explored my cold-smoking options – the simplest of which is the method used by my colleague at Cookblog – before settling on this simple yet effective device:

I applied the two hours of cold smoke before switching to hot.

While I waited, I baked a loaf of caraway rye using the recipe from the Bread Baking Basics iPad app.

Once off the smoker, I steamed the pastrami in the oven for three hours, winding up with this:

My deli slicer hadn’t arrived yet, so I tried as best as I could to make thin slices…

…which I piled onto the sliced rye and served with kosher garlic dills.

The sandwich was very tasty, but the thick meat slices made it too chewy. I decided to wait until I had my slicer before my second attempt, which I served to the same crew that made the trip to Schwartz’s. This was the original smoked meat sandwich:

and this was my interpretation:

I know my bread was better, and I think I matched the quality of their meat, although my slices were definitely fattier than “medium.” As they did in Montreal, my panel of judges wolfed down their sandwiches, which I take as a hearty endorsement of my charcuterie hebraique.

Homemade pastrami is so much better that what I can get around here (at least in Boston, elsewhere your mileage may vary) that I’m considering having it on hand all of the time. I almost always have room in my smoker; with a little planning I can multitask and have a fridge full of smoky goodies.

Je Me Souviens de la Viande Fumée on Punk Domestics
Posted in food & cooking | Tagged , , , | 4 Comments

Breakfast of Champions

Making Eggs Benedict was one of my sure-fire Impress the Ladiesâ„¢ moves. Having secured the necessary ingredients the day before, I’d get up early, set up a pot of simmering water, split muffins, make a hollandaise, and then wait for the object of my affection to arrive in the kitchen before transmuting base ingredients into the perfect breakfast. Word of this particular talent got around; I once had to prepare brunch for a party or twelve hung over post-wedding guests.

When my life became inextricably entwined with that of She Who Must Be Obeyed, I knew I’d have to step up my game. I wouldn’t just make Eggs Benedict, I’d serve it to her in bed on one of her weekend visits. Same ritual: get up early, start the water, etc., but this time I had a spectator. One of my housemates watched in rapt fascination as I assembled plates, asking “You’re doing all of this for a breakfast in bed? What’s wrong with a Pop Tart?” She was so impressed she even took a photo:

She Who has a copy of the photo, and every now and then she’d leave it out somewhere, a less-than subtle hint that she wanted the royal treatment. Unfortunately, I had grown bored with the dish, mostly due to dissatisfaction with the ingredients. Supermarket English muffins tasted terrible, but better quality muffins were much thicker and skewed the bread to egg ratio in the wrong direction. The real culprit, however, was the Canadian bacon – too-thin rounds that dried up the minute you dropped them in a pan to heat up.

When I saw simultaneous posts about the April Charcutepalooza April challenge and Michael Ruhlman’s  Eggs Benedict from scratch challenge I jumped at the opportunity to make my own Canadian bacon. I broke down an entire pork loin into two four-pound chunks and three thick chops, trimming all of the fat from the future bacon but leaving it on the chops.

After a two-day brine, the meat hit the smoker, where it bathed in cherrywood smoke (I have an entire tree’s worth of cherry logs) for about four hours, until the internal temperature reached 150°F.

I let the finished product cool down before wrapping and refrigerating it.

Thursday night isn’t always pork chop night – we’re not the Simpsons – but the three pan-seared chops were dinner and a quality control test:

The day before Sunday’s brunch I made my own English muffins using the recipe Ruhlman provided. Having a large griddle and a set of muffin rings made the process idiot simple.

The next morning I began the familiar routine: simmer the water, make a hollandaise (the blender recipe from Ruhlman’s post), toast the muffins, cut thick slices and warm the bacon, and poach the eggs (using my Badass Perforated Spoon). The dish came together much more quickly than before, finished with a garnish of blood orange supremes.

Best Eggs Benedict ever. The muffins were crunchy and yeasty, the eggs were perfectly poached, the sauce was warm and buttery, but the bacon stole the show. It was moist and smoky – components that I had never experienced before in the dish but were so clearly necessary. My only quibble was with the consistency of the hollandaise, which was thinner than what I could whisk by hand.

I no longer have to impress the ladies, but I’ve re-acquired my Eggs Benedict mojo. I have muffins left over and a whole lot of canadian bacon – I think it’s time for a few “breakfast for dinner” nights.

Breakfast of Champions on Punk Domestics
Posted in food & cooking | Tagged , , , | 6 Comments

Miso Hungry

By the time my participation in Charcutepalooza became official, I had already missed the January (duck prosciutto) and February (bacon) challenges. I have made both previously, but in the spirit of the challenge I thought it only fair that I make each again. I was happy to repeat the duck prosciutto recipe with no variation since my first batch could have cured for longer. Repeating  bacon, on the other hand, required a new approach.

That’s when I saw this post at cookblog. It hadn’t occurred to me to use miso as a cure, nor had it occurred to me to use bacon as the main component of a savory course. After asking about the proportion of miso to maple syrup in the cure – and getting zinged about my previous run-in with the Somerville FD (“make extra for the firemen”) – I was ready to give the cure a try with a smaller chunk of pork belly I had lying around in the Deep Storage Facility. I started with a quarter cup of grade B syrup (New Englanders all know grade B is the better, stronger stuff), a half cup of shiro (white) miso, and a little over a pound of pork belly.

I mixed the miso and syrup together, then generously slathered it over the pork.

I placed the belly in a plastic bag, then let it rest in the fridge, where it got turned once a day for a week. When the belly felt considerably firmer, I removed it from the bag and rinsed off the cure. (And while I’m on the subject, why can’t I get generously slathered and then turned once a day?)

After a few hours of (incident-less) exposure to cherrywood smoke, the bacon was finished.

I removed the skin while the slab was still warm (of course I saved it), and stored the bacon in the fridge until I could figure out what to do with it. While preparing for the roast chicken buns it occurred to me that the bacon could be treated like roasted pork belly. I cut it into thick slabs and crisped them up on the stove.

They became one of the components of the steamed buns dinner.

The bacon buns stole the spotlight from the chicken, with the miso and smoke cutting through the aggressive hoisin/sriracha combination. He Who Will Not Be Ignored cut to the heart of the issue as usual, asking “Why did you bother with the chicken?”

My only regret is using such a small slab of pork to begin with. I have enough left for a breakfast garnish (slow-poached eggs with miso butter and miso bacon, perhaps) before I have to risk once again running afoul of the law. But it will be worth it.

Posted in food & cooking | Tagged , , , | 4 Comments

Chinese Roast Chicken Buns with Scallion and Spicy Hoisin Sauce

I have avoided making my own steamed buns due to the easy availability of the frozen version at H Mart, at least until recently. I inadvertently planned my shopping trips on the days when the freezer case is devoid of buns; the large empty space where the buns should be reminded me of my failure. The last time I chose to make pork buns – a Super Bowl party snack – I tried a different source, the Hong Kong Market in Malden, formerly a Super 88. I spent half an hour examining every bag in the freezer section, failing to find what I needed. As a last resort, I tried asking one of the employees for assistance.

“Steamed buns?” I asked, realizing he spoke little to no English.

He gestured to the case behind me, with an expression that seemed to say “Are you unaware of what’s behind you?”

Mantou?” I asked, trotting out one of the few Chinese words I know.

“Ah, mandou,” he replied, and pulled out a bag of mini buns.

I held my hands together, spread them apart, and asked “bigger?”

“Ah, come,” he grunted, and shuffled away to the refrigerator case, where I found a package of buns – rolled instead of folded, but an acceptable substitute.

All of this is my roundabout way of explaining why I realized I would have to break down and make my own mantou from now on; it had to be less trouble than trying to buy it. Still, I was unhappy at the prospect of having to make fifty at a time, the minimum amount from the Momofuku recipe. Then I saw this recipe in A Bird in the Oven and Then Some. It looked simple, not too time-consuming, and the yield was an even dozen buns – just enough for dinner at Chez Belm.

The dough isn’t very complicated: it’s made from a cup of all-purpose flour, a half cup of cake flour, one and a half teaspoons each of yeast and sugar, an eighth of a teaspoon of sea salt, and half a cup of warm water (I wish all baking recipes would also include gram weight equivalents).

I whisked the dry ingredients together in a large bowl, added the water, and mixed the dough by hand, adding a tablespoon or two of extra water to bring everything together. I kneaded the dough for five minutes on a floured surface, then set it into an oiled bowl to rise.

During the first rise (about an hour, covered with a towel in my turned-off oven) I cut a dozen 2.5 inch squares of parchment paper. My OCD (actually CDO – the letters belong in the correct order, dammit!) thanked me for the diversion.

When the dough had doubled in size I punched it down and rolled it into a log a little less than two inches thick. I cut it into twelve pieces, rolled the pieces into balls, and set the balls on a baking sheet for a second half-hour rise after covering them with plastic wrap.

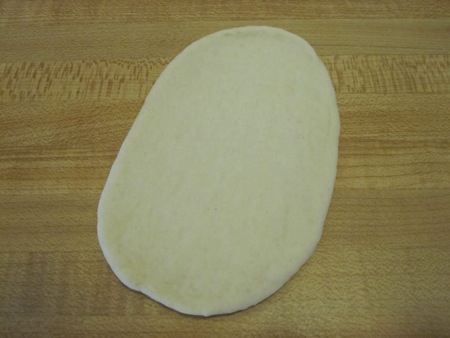
Using a rolling pin, I flattened each ball into an oval about five inches long and two inches wide.

I brushed the top side with oil, then folded it over, using a chopstick to provide a gap at the fold, a technique from the Momofuku recipe.

Each folded bun was placed on a parchment square, put back on the baking sheet, covered, and allowed to rise one last time for half an hour. I laid them out in my bamboo steamer to cook.

While the buns steamed I assembled the filling: sliced breast from the left over Tea-Brined Five-Spice Roast Chicken, some quick pickled cucumber slices, julienned scallions, hoisin sauce, sriracha, and a special pork preparation.

I unfolded the steamed buns, smeared hoisin on one side and sriracha on the other, added the meat, and topped with cucumber and scallion slices.

I folded over the tops, and we were good to go.

I wasn’t sure chicken would stand out when combined with the assertive flavors of hoisin and sriracha, but the five-spice and smoke flavors came through in perfect balance. Add in the crunch and bite of the scallions and cucumbers, and these these little packages barely lasted ten minutes on the plate. I’ll be making more buns soon, now that I know how simple the process can be.

And what about the “special pork preparation?” It’s miso-cured bacon, the subject of a future post.

Posted in food & cooking | Tagged , , | Comments Off on Chinese Roast Chicken Buns with Scallion and Spicy Hoisin Sauce

Another Mac & Cheese Idea

Hello new visitors from Ruhlman-land, thanks for checking out my blog. Have a look around, read about my adventures in charcuterie. A search on “Ruhlman” or “Ratio” will turn up a good amount of reading material, including an amusing exchange concerning the Ratio chart.

I never know what He Who Will Not Be Ignored will choose when he is offered the opportunity to decide what I will cook for dinner. This time it was macaroni and cheese, a dish that while simple still requires a bit of fussing. I had settled on a standard recipe two years ago, but decided to treat this request as an opportunity to revisit the method. Between then and now I had read Ideas in Food, and remembered that it included a mac and cheese recipe.

Where this recipe differed from the usual suspects was in its use of evaporated milk in the place of a bechamel, and a pre-soak of the dried pasta in water, a technique similar to that employed in the six-minute risotto. I assembled my ingredients: ten ounces of extra-sharp Cheddar, ten ounces of pepper Jack (which stabilizes the Cheddar and adds a spicy kick), a pound of elbow macaroni (soaked in two quarts of water for an hour), a 12-ounce can of evaporated milk, two-thirds of a cup of fresh breadcrumbs, a half cup of grated Parmigiano cheese, three tablespoons and eight tablespoons of butter, a half teaspoon of cayenne pepper, and three-quarters of a teaspoon of sea salt.

I heated the milk, butter (the larger portion), salt, and cayenne over medium heat until the butter melted, then slowly added the cheese, stirring after each addition, until I had a smooth sauce.

I drained the soaked macaroni (I tasted a piece, it was soft and chewy) and added it to the sauce, cooking and stirring over medium heat for ten  minutes.

While the pasta cooked, I mixed the breadcrumbs and Parmigiano together.

I spread the cooked pasta into a buttered three-quart baking dish, covered it with the crumbs, and then sprinkled the remaining three tablespoons of melted butter over the top.

I placed the dish under a low broiler for about five minutes, until the topping browned.

After a five-minute rest (which He Who had considerable difficulty enduring), I plated the macaroni with a small salad.

I’m a convert. This is the best mac and cheese I’ve ever made. The pasta still had a bit of bite, the cheese sauce was smooth, and the crust was shatteringly crunchy. The only criticism came from He Who, who said “it’s okay that it’s not orange, but it needs bacon.”

This entire recipe came together in less than half an hour of active work, with the most labor-intensive step being grating the cheese, which I did while the pasta soaked. Tasty, simple, and effortless: a winning combination.

Posted in food & cooking | Tagged , | 6 Comments

Catastrophic Pump Meltdown

My desire for precision and accuracy occasionally leads to trouble. It wasn’t enough to have constructed my own immersion circulator, I had to test it to make sure it would be accurate through the range of temperatures (60°C – 85°C) I would need for sous vide cooking.

My plan was simple: I’d set the circulator at various temperatures, starting at 50°C, stepping through 5°C increments, and ending at 90°C. I would plot the value reported by the circulator thermocouple (green LEDs in this photo) against the actual temperature recorded by my calibrated digital probe thermometer (Thermapen). If the numbers lay along a straight line, I would be able to program an offset into the controller.

If only it had been that simple. The first thing I had to do was change the pre-set upper temperature limit in the controller from 40°C to 100°C, which would give me the testing range required. I immediately noticed a huge discrepancy between the set temperature (orange LEDs), reported value, and actual temperature. After a bit of fiddling with sub-menus (a process not improved by an interface that uses only four buttons) I programmed an offset of -28°C – a negative temperature correction that seemed to resolve the discrepancy at 60°C.

As I began the stepwise testing, I realized that the offset would have to change, and dusted off my algebra knowledge to calculate a slope (y = mx + b, remember?). Then it occurred to me to check all of the settings for the thermocouple, which is when I discovered that the reported value was being stated in °F instead of °C. Once I fixed that, I was ready to begin in earnest.

I stared at 55°C and stepped up, but when I got to around 75°C my readings seemed to level off. As I stared at the circulator, watching vapor escape from the tub of water, it hit me: I had reached the equilibrium point where evaporative cooling was perfectly balanced with the heat input. I solved that problem by floating about 100 ping pong balls ($12 for a gross at Amazon) on the surface of the water bath. They prevented further heat loss, and could easily be moved aside to add or remove cooking bags.

I got the water up to 75°C, then 80, and 85°C, when I noticed that the pump was making a lot of noise. I reached 90°C, shut off the pump, and let the whole rig cool down overnight. The next day, when I turned on the circulator, I didn’t hear the pump, and couldn’t see the water circulating. That’s when I noticed it had melted, as seen above. The cover was completely ruined and the case had begun to warp. Much to my surprise, the pump still worked with the cover removed, but I didn’t want to risk having it crack open and dump raw current into the ungrounded water bath.

After a bit of online research I learned that most of these pumps were rated only to 85°C. I bought a replacement, and instaled it this past weekend:

It’s larger and sturdier, but I decided to seal the snap-on cover to the rest of the unit with silicone cement. It runs quietly and survived another test run, but as added insurance I reprogrammed the upper limit to not exceed 86°C. I’m satisfied enough with the performance of the circulator that I have removed the electrical tape securing the front lid and permanently sealed it with more silicone.

What about the calibration curve that caused all of this trouble in the first place? It’s accurate to a tenth of a degree, with no offset required in the controller. Science: it may get you in trouble at first, but it always works out in the end.

Posted in food & cooking, science | Tagged , | 10 Comments