Three Days of the Corned Beef

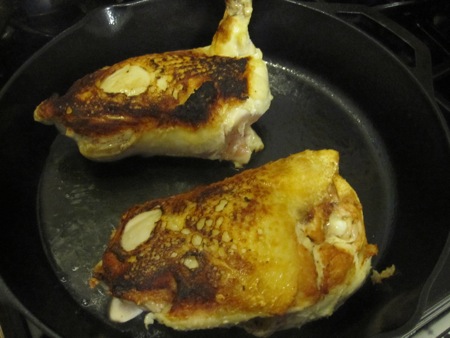
Today is the deadline for the Charcutepalooza March challenge: brining. The apprentice challenge – brining a whole chicken or some pork chops – is something I’ve been doing for years, so I changed it up a bit and brined duck legs instead.

The charcuterie challenge was a bit more complicated: brine a piece of beef brisket to make corned beef. This challenge way way out of my comfort zone, due to accidents of birth and upbringing:

  1. Although my last name is Shaw, I have no Irish ancestry at all. I’m partially of Scottish descent, hence my affinity for haggis.
  2. My Italian mother never cooked corned beef; the closest she ever came was boiled ham and cabbage, a childhood dish my father enjoyed and I loathed.
  3. Despite growing up short train ride away from New York City, I have never eaten at the Carnegie Deli or Katz’s. I may have eaten corned beef once or twice in my life, but it was unmemorable.

With three strikes against me I placed my faith in Ruhlman’s hands and relied on his brine and pickling spice recipes to get the beef started. In five days I was able to turn this:

into this:

As I contemplated how to braise the beef, I saw a recipe from Craigie on Main chef Tony Maws pop up in my Twitter feed, as if he knew what I was working on. He’s never steered me wrong with his food before, so I chose his braising method, which was heavier on the sweet aromatics. During the four hour simmer the house smelled amazing. I began to hope that this completely foreign food would turn out all right. I let the beef rest overnight in the fridge, in its pot of braising liquid, while I figured out how to cook it.

Again Ruhlman came to the rescue, calling attention to his corned beef and cabbage recipe posted last year. I was intrigued by his cabbage preparation; perhaps it wouldn’t become a heap of mushy, stinky, gray-green sludge. I took a chance and prepared the dish for last-minute dinner guests, and it turned out rather well. The beef was so tender it was difficult to slice into whole pieces (note to self: slice beef while cold, then heat up), the cabbage was cooked but still had some crunch, the salty, buttery potatoes provided a starchy counterpoint, and the cooking liquid (enhanced with dijon mustard) tied everything together. I need not comment on the bacon lardons, because, well, bacon.

This corned beef stuff tasted good, and both She Who Must Be Obeyed and He Who Will Not Be Ignored agreed with my plan to convert some of the leftovers into corned beef hash. Again, Tony Maws was reading my mind, because he posted his hash recipe the same day. Although I skipped his suggestion of finishing the dish with hollandaise sauce, I did add the optional poached egg. I served this for dinner, and it rocked the house.

I still had a third of the beef remaining, I was on a roll, so I decided to make reuben sandwiches for She Who, who claims not to have eaten a decent reuben since she moved away from Brooklyn. This was a big risk for me, because I’d have to face down two ingredients I have managed to avoid most of my life: Russian dressing and the dreaded sauerkraut. I could never understand the appeal of a mayo/ketchup/sweet relish mixture, and I could never get past the smell of canned fermented cabbage. But if I could make and eat kimchi and live to tell the tale, I should be able to conquer kraut.

I didn’t have time to make sauerkraut, but I found the next best thing in at my neighborhood market: homemade small-batch sauerkraut sold in refrigerated jars. As for the dressing, the recipe in Charcuterie proved to be my best bet, in that it was refreshingly devoid of relish. I had a slab of Emmenthaler cheese, and had recently baked my own rye (recipe from Ruhlman’s Bread Baking Basics iPad app, but also posted here).

Time to make the sandwiches: This time I sliced the beef while it was cold, using my new toy:

I also used it to slice the cheese and bread, then began the assembly: bread, dressing, cheese, beef, sauerkraut (which, much to my surprise and delight, tasted like brined cabbage), cheese, dressing, and bread.

After a slow toasting on a griddle over low heat, they were done. I served them with homemade pickles.

I was pleased with how these turned out, but had to wait for She Who’s considered opinion: “This is a fine sandwich. You need to make them again.” It was all there: salty beef, crunchy cabbage, nutty cheese, rich dressing, and hearty bread.

Three days, three meals, three successes, all with a previously unknown ingredient. I feel like Iron Chef Charcuterie. (That’s a good idea –  maybe Michael Symon will consider adopting the name.)

One challenge down. Next up: hot smoking, which should be a walk in the park. As long as my local FD doesn’t intervene again.

Three Days of the Corned Beef on Punk Domestics
Posted in food & cooking | Tagged , , | 10 Comments

Duck Variations: Salted Duck Legs, Green Beans, and Cornmeal Dumplings

In the introduction to this recipe from The Whole Beast, Fergus Henderson warns:

This is a dish you have to think about a week ahead.

That’s what I was thinking as I unpacked my case of duck legs, so I reserved six of them for this recipe and gathered the ingredients for a brine: two cups of sugar, two and a quarter cups of kosher salt, two bay leaves, and 12 each of whole peppercorns, cloves, and juniper berries.

I added everything to a bucket with four quarts of water, stirred until the salt and sugar were dissolved, added the duck legs, then stored the bucket in the fridge. I used a plate to keep the legs submerged.

After a week I was ready to poach the legs in aromatics (a head of garlic, two peeled and halved onions, two cleaned leeks, two peeled carrots, two stalks of celery, two bay leaves, twelve peppercorns, and a bundle of thyme and parsley) and make the dumplings (two eggs, seven ounces of finely diced wheat bread, two ounces of minced bacon, two thirds of a cup of freshly grated horseradish, and three quarters of a cup of fine yellow cornmeal).

I put the duck and aromatics in a pot and added water to cover, then simmered the legs for about an hour, until they were fork tender.

While the legs simmered, I combined the rest of the ingredients by hand until they formed a sticky dough. My dough was slightly drier than I expected.

According to the recipe, I should have been able top make about a dozen three quarter-inch dumplings; I wound up with fifteen inch and a half dumplings instead.

I transferred some of the cooking liquid from the legs to another pot, brought it to a simmer, added the dumplings, and cooked them for ten minutes.

When the legs were done I set them aside, strained the cooking liquid, brought it to a boil and added two pounds of trimmed green beans, letting them cook for three minutes.

To plate, I spooned some beans into a bowl, topped them with a duck leg, added a few dumplings, and then finished with a ladleful of the cooking liquid.

The brine firmed up the legs a bit, so they weren’t as meltingly tender as a braised version. I though the salt would be the dominant note, but was surprised at the sweetness the brine imparted. As for the dumplings, while the flavor combination – bacon, bread, horseradish – contrasted with the duck, the texture was off. She Who Must Be Obeyed, queen of dumplings, pronounced them “a bit dense, and dry inside.” I can only assume I used too much bread, but I was sure I followed the recipe’s proportions.

Since we had a guest for that meal, I had only two legs left over for dinner this evening. My solution: re-warm the legs in the remaining stock and shred them, render some bacon lardons, quarter the remaining dumplings, and assemble an arugula and shallot salad. I reserved some of the bacon fat to dress the salad (along with a splash of merlot vinegar), and used the rest to crisp the dumplings and make croutons.

Not bad for leftovers. It’s hard to go wrong with bacon, or duck.

Posted in food & cooking | Tagged , | 1 Comment

Baby’s First Hydrocolloid Kit

Today I had a revelation: My fascination with food and food chemistry began when I was a child, and it started with a toy. While my friends all begged their parents for Creepy Crawler sets, I asked for – and was given – an Incredible Edibles set. Both of these toys worked on the same principle: fill an aluminum mold with glop and cook it over an open hot plate until the glop cured. Plastigoop, the glop used in Creepy Crawlers, turned into rubbery plastic, while Gobble De-Goop, the glop for Incredible Edibles, turned into gummy candy. Here’s a collector’s photo, which is an accurate representation of my set:

It’s worth pointing out a few facts about this toy.

  1. The “oven” was a naked hot plate with an aluminum cover guaranteed to burn you if you didn’t lift it by the nose/handle.
  2. The Gobble De-Goop provided was just enough to make one or two of everything in the molds, which included flowers and butterflies as well as bugs and worms. Utilizing the classic “sell the blades, not the razor” tactic, Mattel hoped to drive a lucrative business in additional molds and goop.
  3. Unfortunately, the “candy” tasted horrible. Of the six flavors available – cherry, mint, cinnamon, root beer, licorice, and butterscotch – only the cinnamon was tolerable, probably because it masked the weird taste of the gel base.

Incredible Edibles was eventually taken off the market, in part due to a rumor that one of the goop ingredients was carcinogenic (probably sodium cyclamate, a sweetener that was banned by the FDA after some spectacularly sensationalistic cancer claims), and in part due to the inherent safety issues that would accompany letting a child mess around with an unprotected hot plate. Mattel continued to market other hot plate based toys (they must have had a warehouse full of heating elements) that culminated in the Strange Change Machine, which is possibly the greatest toy I have ever owned.

I moved on to chemistry sets, which I never used to modify food. To the best of my knowledge, the world of food-related toys was limited to variations on the Easy-Bake Oven (cooking with lightbulbs!) and mold-your-own chocolate kits. In 1995, friends who had been watching my development as a cook bought me a new food toy that had just hit the market, the Doctor Dreadful Food Lab:

Instead of packages of gel that had to be baked, the lab came with packages of gelatin and other fizzy components that you mixed together in plastic beakers and test tubes. I kept the kit for years, buying refills whenever I saw them at stores. He Who Will Not Be Ignored loved making “gross stuff” with the lab, especially the “worms” that would form when you squirted one liquid mix into another.

Tyco discontinued the Food Lab and its partner Drink Lab, and I once again forgot about food toys. Until last month, when I saw this video:

I had to have one of those kits, which I found for sale at White Rabbit Express. A few weeks later three kits arrived, and He Who and I tore into one. All of the information we needed was printed on the box, but in Japanese. Fortunately I have some limited ability with the language, and was able to translate the front. The title, tanoshii o-sushiya-san, translates to “fun sushi shop,” while the baners next to each sushi candy are maguro (tuna), tamago (sweet egg cake), ikura (salmon roe), and chirashi (scattered).

The back of the box was another matter, well beyond my limited nihongo abilities.

Just today, while assembling the links for this post, I discovered an english translation of the instructions, but, due to clever color-coding and packaging, I was able to figure out how to proceed.

The box contains a plastic tray with molded compartments, six packets of stuff, a stirring paddle, a water dropper, and a packet of what looked like black chewing gum.

The larger light blue packet was labeled gohan (rice), the pink packet was maguro, and the yellow packet was tamago. The packets labeled A and B corresponded to compartments in the tray, which left the purple packet for us to figure out. But first, we mixed each candy in its corresponding compartment. In the video, the water dropper was used to fill the compartments to their respective fill lines – there’s a small compartment at the top center labeled mizu (water) – but I found it easier to pour water from a small measuring cup.

We added each packet’s contents to the water, stirred with the paddle ansd let everything set. When we were done, we had grainy white “rice,” pinkish-purple “tuna,” and bright yellow “egg.” We flattened out the black gum to make a nori wrapper, and filed chambers A and B with their corresponding ingredients.

Here’s where things got interesting. Using the dropper, we sucked up some of the orange liquid from compartment B and dropped it into the blue liquid in compartment A, where it formed perfect little spheres.

He Who, remembering the Doctor Dreadful kit, said “It’s just like the worms!” I, on the other hand, said “Wow, a spherification toy.”

We cut the various components apart and assembled our “sushi.” We made maguro and tamago, noting the fish and egg texture lines provided by the mold.

Then we moved on to the ikura and chirashi, where we learned that the mysterious purple packet was a garnish.

They looked cool, but all tasted the same, that generic “fruit” flavor found in many Japanese candies and beverages. If you’ve ever had Ramune soda (or Irn-Bru, if that’s how you roll) then you know exactly how the candy tastes.

It’s cute, it has an inoffensive taste, so what’s the big deal with this kit? It’s a gateway drug for modernist cuisine techniques. When you add part B to part A, you are dropping a calcium alginate solution into a calcium lactate solution, which results in spherification, a technique first utilized by Ferran Adriá. That’s right, for a measly five bucks you can emulate cuisine found at El Bulli, the best restaurant in the world. It won’t taste the same, but the process is identical. You also get a crash course in dispersing and hydrating hydrocolloids when you prepare the sushi toppings.

I’m waiting for the day when He Who wants to move beyond candy; I already have more sophisticated kits at my disposal. Until then, we’re eagerly awaiting the Zombie Drink Lab, one of the new additions to the recently revived Doctor Dreadful line.

Braaiins!

Postscript

William Gibson, whose fiction chronicles our unevenly distributed future, knew about Japanese candy trends before they became hip. This passage is the beginning of chapter 20 of All Tomorrow’s Parties, published in 1999:

Boomzilla likes this Jap candy that’s like a little drug lab. You mix these different parts, it fizzes, gets hot, cools. You do this extrusion-molding thing and watch it harden. When you eat it, it’s just candy, but Boomzilla likes making it.

I think “Baby’s First Hydrocolloid Lab” is more marketable than “Baby’s First Drug Lab,” but that’s just one man’s opinion.

Posted in culture, food & cooking, science | Tagged , | 4 Comments

Shiitake Swiss Chard Soup with Hand-Cut Noodles

This is a vegetarian recipe from David Chang, the chef whose menu once proclaimed “We do not serve vegetarian-friendly items here.” It appears in the March 2011 issue of Food and Wine, in an article about Chang’s trip to a Korean monastery. I was inspired to try it because it looked good, it utilized a new technique, and, lastly, because it was a David Chang recipe.

During his recent lecture at Harvard, Chang described a new technique for making ramen broth. It began with the usual steeping of kombu in water, but then used ground dried shiitake mushrooms to extract the maximum amount of flavor. This recipe began the same way: I simmered a ounce of kombu in 14 cups of water for 30 minutes.

I assembled the rest of my ingredients: three ounces of dried shiitakes (finely ground in a food processor), two cups of flour, three quarters of a cup of water, a half cup of soy sauce, a quarter cup of mirin, six ounces of fresh shiitakes (caps thinly sliced, stems cleaned and reserved), and a pound of Swiss chard (stems finely chopped, leaves roughly chopped).

I mixed the flour and water together in a standing mixer with a dough hook, about ten minutes, until the dough was smooth.

I wrapped the dough in plastic and let it rest for 30 minutes. By this point the kombu had simmered for half an hour, so I discarded it. I added the ground mushrooms (and the reserved stems – not in the original recipe, but why throw out extra mushroom flavor?), brought the mixture to a boil, covered and removed it from the heat, and let it sit for 30 minutes.

I strained the broth and returned it to the pot. I briefly considered flattening and dehydrating the mushroom sludge, but I don’t (yet) own a dehydrator.

While the soup steeped, I rolled out the dough to about an eighth of an inch thick and cut it into uneven strips.

I added the soy sauce and mirin to the soup stock and brought it to a boil, then added the chard and shiitake slices and cooked for two minutes. I added the noodles to the soup and cooked for an additional five minutes before serving. Chang recommends garnishing with kimchi and honey, but I was out of kimchi, so I substituted a slash of kimchi consommé and a quick pickle I made of watermelon radish.

For a soup with so few ingredients, this had a remarkable depth of flavor. It came close to matching the smoky undertone of a full-blown ramen stock, yet took only a fraction of the time to make. The chard still had a bit of bite, the pickled radish added salty-seweet crunch, and the noodles were sort and chewy. There was enough soup for two meals, so for the second round I added some shredded pork shoulder (left over from ramen) which almost pushed the soup into overly rich territory.

I plan on making this again, but I also intend to keep the Belm Utility Research Kitchen stocked with a supply of ground dried mushrooms for making quick Asian stock. If I can whip it together in an hour, there’s no need to keep it in the freezer – a good thing, since the Deep Storage Facility is full to capacity.

Posted in food & cooking | Tagged , | Comments Off on Shiitake Swiss Chard Soup with Hand-Cut Noodles

Duck Variations: Duck Legs and Carrots

The first time I spent my own money on fine dining was in August of 1980. My girlfriend was visiting on her birthday weekend and I wanted to do something special for her. Somehow I managed to score a reservation for two in the Crystal Room at Tavern on the Green in Central Park on the weekend of the Democratic National Convention (Carter and Mondale, but I voted for Anderson – remember him?). I had it all planned out; it was going to be a huge surprise.

We took a train to the city, then a cab to the park. I gave the cabbie the address of the restaurant rather than the name so as not to spoil the big reveal when we arrived. We pulled up to the front, I paid the cab, and my girlfriend said “What’s Tavern on the Green?” So much for surprises. The staff immediately made us as a bunch of kids who could be hustled out of the room as quickly as possible to turn the table for a better tipping high-rolling politician. We were seated facing away from the view over the park, our waiter was brusque to the point of being rude, but I was determined to get my money’s worth, choosing to take my time eating.

The only thing I remember about the food was that I had duck, a classic presentation of crispy leg and seared sliced breast. I don’t know how well it was prepared, having to standard of comparison, but I loved the taste. From that point on you could win bets predicting that I’d choose the duck entrée at any restaurant that served it. I finally laid that obsession to rest after my lunch at Bouchon, content in the knowledge that I’d eaten the Platonic ideal caneton á l’orange.

When I was sourcing ingredients for the marathon cooking session in January, I noticed that Restaurant Depot sold duck legs in 20-pound frozen flats. A few weeks ago I bought a box, partially thawed it and portioned out 40 eight-ounce legs. Some immediately became cooking projects, the rest were repackaged in bags of four and returned to the Deep Storage Facility. Six legs were set aside for this recipe from Fergus Henderson’s The Whole Beast: Nose to Tail Eating.

I assembled the duck legs, a peeled and sliced onion, two sliced leeks, 14 medium carrots (chopped into quarter-inch rounds), 8 cloves of peeled garlic, a parsley and rosemary bundle, one jalapeño pepper, two bay leaves, and about two cups of chicken-leek stock.

I browned the legs on both sides in a tablespoon of duck fat.

After setting the legs aside, I cooked the onions, leeks, garlic, and carrots in the rendered fat, then transferred them to a baking dish, adding the jalapeño and herb bundle.

I set the legs on top of the aromatics, then added enough stock to partially cover the legs. After an hour and a half in a 375°F oven the legs were done.

I set the legs aside, strained the stock from the vegetables (which I also set aside), and reduced the stock a bit to concentrate it. I plated the leg over the vegetables and added a few spoonfuls of the sauce and some parsley to garnish.

Some of my more attentive readers might notice the similarities between this recipe and the crisp-braised duck legs I cooked about a month ago. The technique is identical, but the type and ratio of aromatics is different. This version has more carrots and leeks, and adds onions while omitting celery. The resulting sauce is sweeter, which I preferred. Even He Who Will Not Be Ignored noticed the difference, commenting “You should make this version from now on, the carrots are better.”

Who am I to argue? It seems I’m dealing with a case of like father, like son, with He Who asking for duck for dinner. That’s what leftovers are for, and he happily ate this variation served over mashed potatoes with a side of arugula in duck confit jelly vinaigrette.

Duck confit jelly? Yup, a by-product of a second duck project. But that’s another post.

Posted in food & cooking | Tagged , | Comments Off on Duck Variations: Duck Legs and Carrots

Cereal Milk

It’s rare for a cookbook recipe to tell you up front “this is really hard to make,” that’s not how you sell more cookbooks. It’s even rarer for a cookbook author to scrawl “This recipe doesn’t work” across his own book, but that’s exactly what Peter Meehan did when I presented him a copy of Momofuku to autograph.

I wanted to make this dessert as the last course in the Valentine’s Day meal I cooked for She Who Must Be Obeyed that included the brick chicken, and oysters with kimchi consommé. It looked easy but time-consuming: a panna cotta with three garnishes (chocolate-hazelnut thing, avocado purée, caramelized cornflakes) and a sub-recipe (praline paste) . I had a few days lead time, I had all of the ingredients, there was no difficult technique involved, but I was still filled with dread: This recipe doesn’t work. I read through the recipe looking for obvious errors but couldn’t find any. There was nothing left to do but barge on ahead.

Praline paste

I began by making the base for the chocolate hazelnut thing. (Yes, it’s called a “thing” in the book.) I weighed out 70 grams of hazelnuts and 100 grams of sugar.

I toasted the hazelnuts in a 400°F oven for 15 minutes, let them cool, then used a kitchen towel to rub off the skins (a trick I learned from Julia Child). While I worked on the nuts, I added the sugar to a small saucepan and set it over medium-low heat, stirring occasionally until I had a dark caramel.

I put the hazelnuts in a blender, added the caramel and a pinch of salt, and ground up the mixture until a “smooth paste” formed. That didn’t happen. Either the nuts were too dry, or the caramel was too thick, but I had to add a small splash of vegetable oil to bring the components together. I wound up with a coarse paste, which would have to do.

Caramelized cornflakes

The cornflakes are incorporated in to the chocolate thing as well as sprinkled over the final plating. I started with 60 grams of cornflakes which I crushed into crumbles, 45 grams of melted butter, and a mixture of 12 grams of nonfat dry milk powder, 12 grams of sugar, and a gram of kosher salt.

I added the butter to the flakes, sprinkled the milk/sugar mixture over them, and tossed them with a spatula until they were evenly coated.

I toasted the mixture in a 275°F oven for about 20 minutes, until the flakes turned golden.

I let them cool, then stored them in an airtight plastic container until needed.

Choocolate hazelnut thing

To make the second garnish I measured out two tablespoons of the caramelized cornflakes, 55 grams of the praline paste, 55 grams of gianduja (hazelnut milk chocolate), and 10 grams of 70% bittersweet chocolate.

I placed the chocolates and praline paste into a glass bowl and mixed in a quarter teaspoon of canola oil, a half teaspoon of corn syrup, and a pinch of kosher salt. I set the bowl over a pan of simmering water and stirred until the mixture was smooth.

I poured the melted chocolate onto a Silpat-lined baking sheet, spread it until it was a quarter of an inch thick, then sprinkled the cornflakes over the top.

I put the chocolate in the freezer to set, then broke it into random pieces which I kept in a container in the freezer.

Cereal milk custard

It was finally time to move on to the main act and another collection of ingredients: 265 grams of cornflakes, 710 grams of whole milk, 470 grams of heavy cream, 30 grams of light brown sugar, 2 grams of kosher salt, and  4 grams of gelatin. Why measure everything in grams? If there’s a possibility of failure, it’s best to use weight instead of volume for your measurements.

I toasted the cereal in a 300°F oven for twelve minutes, then combined it with the milk and cream to make a very big bowl of soggy cornflakes.

After steeping for 45 minutes, I passed the soggy blob through a fine-mesh strainer, pushing down with a spatula to extract as much liquid as possible. When I was done I had a cup and three quarters of milk/cream, which I increased to 2 cups by adding some additional heavy cream. I added the brown sugar to the mixture and warmed it in a microwave. While it warmed, I bloomed the gelatin sheets in two cups of cold water.

I wrung out the gelatin, stirred it into the cream, and poured the mixture into a silicone mold. It’s made for baking cookie bars,with each well holding two ounces. I could have used ramekins, but I figured they would be difficult to unmold later.

I put the mold in the fridge for half an hour to set, then covered it with plastic wrap and moved it to the freezer.

Before serving the next evening, I unmolded four of the blocks and set them on a wax-paper lined tray in the fridge to defrost. I made the final garnish – avocado purée – by blending a ripe avocado with a pinch each of salt and sugar, them passing the mixture through a fine sieve.

To plate, I smeared about two tablespoons fo the purée across a plate, set the custard on top, leaned a piece of chocolate hazelnut thing against it, and sprinkled caramelized cornflakes over everything. I had a lot of trouble keeping the custard intact as I transferred it from the tray to the plate, managing to slide an icing spatula underneath to support it.

Have a closer look at the custard: it has two distinct layers, and the bottom layer is spreading out from its initial shape. Panna cottas are supposed to be soft and creamy, containing the least amount of gelatin necessary to maintain the shape. Adding more gelatin produces hard, rubbery custards that look perfect but taste like pencil erasers.

The cereal milk needed more gelatin. After trying a bite I was sure of that. The upper, darker layer was denser and contained all of the cereal particulates, while the bottom layer melted as soon as it hit my tongue. The ideal custard would have had the cereal evenly dispersed, which would have improved both the appearance and the structure.

The dish certainly looked pretty, but failed in taste as well as texture. The intent of the dish was there, I could taste the cereal, but there was too much salt, which skewed it toward a savory flavor reinforced by the avocado purée. The cornflakes provided a welcome crunchy contrast, but the chocolate-hazelnut chip wound up being too sweet in comparison to the other components. (That’s not to say the chip isn’t tasty. I’ve been exercising incredible willpower by not eating the remaining pieces in the freezer.)

David Chang describes the dish as a transition between the final savory course and the dessert on his menu, a deep fried apple pie. Maybe the salt was meant to assist that transition, but it would clearly need the context of the preceeding and following dishes.

She Who Must Be Obeyed, realizing the amount of work I put into the dessert, tried about half of it. He Who Will Not Be Ignored, however, took one bite of the custard, delivered his considered judgment – “Ick” – and ate the chocolate thing before pushing the plate away.

If I attempted it again – and I’m not sure I ever will – I would add another sheet of gelatin to the custard, cut the salt down to just a pinch, and sweeten the purée with a bit more sugar. Those changes would let the dish stand on its own as a dessert.

Ultimately, Peer Meehan was right: the recipe doesn’t work. Should I ever be in the position to receive more culinary advice from him, I’ll believe it.


Posted in food & cooking | Tagged , , | Comments Off on Cereal Milk

Quazy Energy

Shortly after moving to a northern suburb of New York City in 1965, my new schoolmates asked me to choose a side in a classic rivalry. The Mets vs. Yankees could wait until later (I chose the Mets), they wanted to know if I preferred Quisp or Quake, because breakfast cereals were much more important to five-year-olds than baseball teams.

If you aren’t old enough to remember the cereal wars, this commercial will provide you with the necessary background:

The ad was animated by Jay Ward, the creator of Rocky and Bullwinkle, and used many of the same voice actors. More ads followed, each promoting the rivalry between the two cereals, which eventually culminated in asking viewers to vote for their favorite. Quisp won the vote, and Quake was discontinued, a pattern I had already seen with my baseball choice: despite a “miracle” season in 1969, the Mets soon wound up in the basement.

The irony of having to choose was evident to any child  who had tried both cereals. I made Mom buy a box of each – calling it research – before settling on Quake, but not before realizing that both cereals tasted the same, with only minor shape-releated textural differences distinguishing one from the other. I had another suspicion about the taste, which I confirmed by eating a bowl of Cap’n Crunch: they were all the same cereal, just extruded into different shapes. (Three bowls of sugared corn cereal in one sitting? I call it research, you might call it college breakfast. Or dinner.)

Quisp soon followed Quake into oblivion in the late ’70s, but would be brought back each succeeding decade until it was revived on a wave of hipster nostalgia in 2001, when it became available via mail order from the Quaker web site. It even had a new comercial, animated by John Kricfalusi of Ren and Stimpy fame:

I had heard that Quisp could also be found in Super Target stores, but was still shocked to see it in an end cap at my local Stop & Shop last week. I had to buy a box, just to see if it was the Quisp I remembered. (He Who Will Not Be Ignored was also curious about the “retro cereal.”) I had a bowl for breakfast:

The “saucers” seemed much smaller than I remembered. Was it just an issue of scale, where everything looks bigger to a little kid? Nope, the shape is smaller – have a look at the size at the 35 second mark in this comercial:

But it tasted the same, and, in the interest of thorough research, I once again compared it to Cap’n Crunch (just a small handful, my metabolism can no longer handle large quantities of processed corn sugar) and came up with the same result.

I’ll finish the box, but don’t anticipate buying any more, not when I can get the same flavor hit from a cereal that won’t be subject to the fickle whims of new consumers. Also, I’ve finally perfected the proper consumption method, described in detail by Neal Stephenson in Cryptonimicon:

World-class cereal-eating is a dance of fine compromises. The giant heaping bowl of sodden cereal, awash in milk, is the mark of the novice. Ideally one wants the bone-dry cereal nuggets and the cryogenic milk to enter the mouth with minimal contact and for the entire reaction between them to take place in the mouth. … The next-best thing is to work in small increments, putting only a small amount…in your bowl at a time and eating it all up before it becomes a pit of loathsome slime, which takes about thirty seconds in the case of Cap’n Crunch.

Quisp may be hip, but the Cap’n abides.

Posted in food & cooking | Tagged | 2 Comments

Meat Popsicles

I braved the cold for the monthly meat CSA pickup, which was strangely devoid of people. Maybe I showed up at a lull, but this was the first time ever that I was able to walk up and grab my bag with no wait. In fact, the Stillman’s folks saw me getting out of the car and had my share ready by the tine I reached their truck. It makes me wish they deleivered, but then I’d never have the opportunity to browse through the boxes of odds and ends they like to give away.

This share included ground beef, loose breakfast sausage, pork chops, a T-bone steak, a whole chicken, and lamb rib chops. I added smoked pork chops (a favorite of He Who Will Not Be Ignored) and bacon ends: random chunks of slab bacon that I will use to flavor red beans and rice or might cook like pork belly.

Posted in food & cooking, local | Tagged , , | Comments Off on Meat Popsicles

“Brick” Chicken

I was looking for something unusual to make for She Who Must Be Obeyed for a Valentine’s Day diner when I saw this recipe in Momofuku. How could I pass it up when it began with this introducton?

Your goal is to completely bone out a whole chicken and end up with two boneless halves, each a breast and leg connected by skin. Hey, if you’re going to go though the trouble to find transglutaminase to make this recipe, I’m thinking that deboning a chicken is right up your fun alley.

I didn’t know I had a “fun alley,” but I do know my way around a chicken. A friend once commented “You don’t so much carve a chicken as dissect it.” Although I had never boned out an entire bird, I figured I wouldn’t have any trouble the first time. All I needed was a chicken and a sharp boning knife.

I cut the wing tips at the first joint and removed the wishbone. After popping the leg joints, I made an incision, er, sliced along the line of the breastbone from front to back. Following the line of the ribcage, I peeled back the meat until I reached the backbone, where I made a second front-to-back incision. The entire side came off in one piece.

Repeating the cuts on the other side resulted in two halves and a carcass (which, along with the wing bits went into the freezer for future stock making).

To debone the legs, I made an L-shaped cut along the tops of the bones, separated the meat with the tip of my knife, and cut the bottom of the leg through the tendons to free the leg and thigh bones. The only bones remaining on the two halves were the first wing bone, which would remain for decorative purposes.

After setting each half on plastic wrap, I separated the tenderloins from the breasts and placed them on the thighs where the bone was removed. I seasoned each half with salt and pepper, then sprinkled on half a teaspoon of transglutaminase.

I folded the breast over the thigh, then gathered the skin around the bundle to form a “brick” shape. When the skin was tucked under itself, I pulled the plastic around the bundle, using it to tighten the wrapped chicken. I placed both bundles in a square baking pan, weighed the bricks down with another pan, and put them in the fridge for twenty four hours.

To cook, I set a cast iron skillet over high heat, unwrapped and dried the chicken halves, and browned them in canola oil.

The chicken roasted in a 400°F oven for half an hour, then I basted it on the stovetop with butter (an entire stick!), garlic, and thyme for about two minutes.

I cut each brick into four pieces and served them with the butter sauce, sugar snap peas, and preserved lemon risotto.

I’d like to tell you that the chicken was the best I’ve ever tasted, but I can tell you it comes close. The real advantage of this technique is creating a uniform shape that cooks evenly: the breast and thigh meat were equally done and perfectly moist. The butter sauce was all the accompaniment needed, anything else would have obscured the chicken flavor.

It may seem like a lot of work, but this dish is pretty easy to make. Yo should consider giving it a try, it might be right up your fun alley.

Posted in food & cooking | Tagged , | 5 Comments

Kimchi Consommé for Oysters

It took some convincing to get me to make my own kimchi, but I knew if I ever wanted to have bo ssäm that it would be a necessary ingredient. However, once we had consumed the pork shoulder in a locust-like frenzy, I still had a lot of kimchi left over. I puréed some of it to use in a Fuji apple salad, but that still left a substantial amount to deal with. I couldn’t let it ferment for much longer – I didn’t want to experience truly stanky kimchi – so I searched though Momofuku for another application. The combination of kimchi and oysters had worked surprisingly well in the bo ssäm, so kimchi consommé for oysters seemd like a logical next step. I’d get to use the last of my supply, and learn a new technique – gelatin clarification – all in one go.

I gathered my ingredients: a half cup of puréed kimchi, one and a half cups of hot water, two sheets of gelatin, a tablespoon of rice vinegar, and a teaspoon of sugar.

I added the gelatin and water to a freezer-proof container and stirred to dissolve.

I added the kimchi, vinegar, sugar, and some freshly ground black pepper, and stirred to combine. I was satisfied with the level of kimchi heat, so I covered the container and put in it the freezer. Where it sat for two months while holidays, life, and sickness (good title for the next Arcade Fire record) got in the way.

I promised She Who Must Be Obeyed a belated Valentine’s day dinner last weekend, and thought some oysters with the consommé would be a good first course. To prepare, I unmolded the frozen kimchi-gelatin block from its container and placed it in a cheesecloth-lined fine mesh strainer set over a bowl. I returned this collection setup to the fridge.

After twenty four hours I wound up with a bowl full of clear liquid (seen at the top of this post) and a rubbery puck of kimchi, which I discarded. The gelatin had formed a matrix that trapped all of the particulates, allowing only the liquid component to seep through. This same technique can be used to create a consommé from any liquid, something I’l be sure to try soon.

I popped open six Island Creek oysters, set them in a bowl of ice, and spooned the consommé into the shells until they were full to the brim.

The heat and sweetness from the consommé were a perfect balance to the briny oysters. She Who and I agreed this was a fine alternative to more typical oyster garnishes. Unfortunately, the liquid will only keep for about a week, so we may have to force ourselves to eat more oysters. That, or I’ll have to make more kimchi. Or both.

Posted in food & cooking | Tagged , | 2 Comments