
I was looking for something unusual to make for She Who Must Be Obeyed for a Valentine’s Day diner when I saw this recipe in Momofuku. How could I pass it up when it began with this introducton?
Your goal is to completely bone out a whole chicken and end up with two boneless halves, each a breast and leg connected by skin. Hey, if you’re going to go though the trouble to find transglutaminase to make this recipe, I’m thinking that deboning a chicken is right up your fun alley.
I didn’t know I had a “fun alley,” but I do know my way around a chicken. A friend once commented “You don’t so much carve a chicken as dissect it.” Although I had never boned out an entire bird, I figured I wouldn’t have any trouble the first time. All I needed was a chicken and a sharp boning knife.

I cut the wing tips at the first joint and removed the wishbone. After popping the leg joints, I made an incision, er, sliced along the line of the breastbone from front to back. Following the line of the ribcage, I peeled back the meat until I reached the backbone, where I made a second front-to-back incision. The entire side came off in one piece.

Repeating the cuts on the other side resulted in two halves and a carcass (which, along with the wing bits went into the freezer for future stock making).

To debone the legs, I made an L-shaped cut along the tops of the bones, separated the meat with the tip of my knife, and cut the bottom of the leg through the tendons to free the leg and thigh bones. The only bones remaining on the two halves were the first wing bone, which would remain for decorative purposes.

After setting each half on plastic wrap, I separated the tenderloins from the breasts and placed them on the thighs where the bone was removed. I seasoned each half with salt and pepper, then sprinkled on half a teaspoon of transglutaminase.

I folded the breast over the thigh, then gathered the skin around the bundle to form a “brick” shape. When the skin was tucked under itself, I pulled the plastic around the bundle, using it to tighten the wrapped chicken. I placed both bundles in a square baking pan, weighed the bricks down with another pan, and put them in the fridge for twenty four hours.

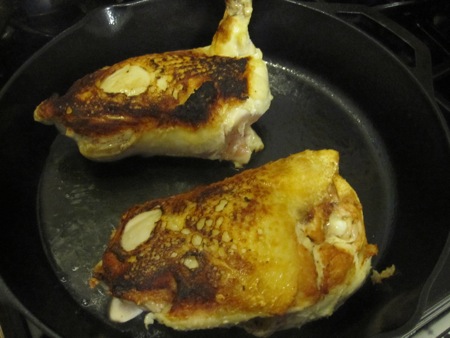
To cook, I set a cast iron skillet over high heat, unwrapped and dried the chicken halves, and browned them in canola oil.

The chicken roasted in a 400°F oven for half an hour, then I basted it on the stovetop with butter (an entire stick!), garlic, and thyme for about two minutes.

I cut each brick into four pieces and served them with the butter sauce, sugar snap peas, and preserved lemon risotto.

I’d like to tell you that the chicken was the best I’ve ever tasted, but I can tell you it comes close. The real advantage of this technique is creating a uniform shape that cooks evenly: the breast and thigh meat were equally done and perfectly moist. The butter sauce was all the accompaniment needed, anything else would have obscured the chicken flavor.
It may seem like a lot of work, but this dish is pretty easy to make. Yo should consider giving it a try, it might be right up your fun alley.
Without commenting on exactly where my “fun alley” resides, I do know that I’d prefer to sate my boneless chicken needs by buying direct from the farmer at the boneless chicken ranch. The last time I tried to bone anything like a chicken (and it was a turkey, so larger == easier), the poor thing ended up looking like it died by losing a fight with Edward Scissorhands. IIRC, I made Yu Shiang Turkey with it.
Mmmm… boned turkey. I have a recipe that removes the breasts and skin, then glues one breast (inverted) to the other. The result is a single thickness of breast, which gets wrapped in the skin and roasted.
I’ve been dying to make this but have been balking at investing in a 2.2 lb package of “meat glue”. Were you able to find a smaller package or did you take the leap?
I had to buy a kilo from L’Epicerie to use in this recipe: http://blog.belm.com/2010/06/03/degustation-de-porcelet-part-3/. I divided the unused amount into 100g portions, added a desiccant pack to each, vacuum sealed the bags, and put them in the freezer. Many cooks are trying to convince Ajinomoto to sell smaller portions, we’ll see how that turns out.
Thanks for reading! I grew up in Pelham, a culinary desert, but I’ve bookmarked your blog. The last decent meal I had in Westchester – apart from hot dogs at Walter’s – was a lunch at Tarry Lodge.
Thanks! How funny that you’re from Pelham, small world! The culinary scene in Westchester has vastly improved with a lot of NYC chefs following the migratory pattern of Batali, Dan Barber, etc. And, of course, we still have Walters.